skip to main |
skip to sidebar
We are leaving for Utah tomorrow, so this will be my last of the month-long recipes. Sorry I didn't do a real month, but I did do 4 full weeks. But since we're leaving tomorrow and I didn't want to mess up the kitchen or take too much time on dinner since we still have a lot of cleaning and packing left to do, I shamefully succumbed to the temptation of convenient McDonald's. So, I'm sorry but, not recipe today. Fast food has always seemed like a bit of a treat for me, but I have to admit after a month of home-cooked, (attempting to be) healthy meals, it was a little ... disappointing.
Thanks, Rebekah, for encouraging me to do this. It was so fun to come up with semi-balanced, yummy meals every day for a whole month. It was helpful to document what we eat everyday and make some adjustments here and there. I had so much fun! I can't wait to get back to cooking when I get back next Saturday. But until then, I look forward to feasting on my sister's much better home-cooked meals. Mmmm!

Every issue of Cook's Country magazine has a section called "recipe make-over" where they challenge themselves and re-make a traditional recipe and make it lower in fat and calories without compromising taste or looks. One month in particular caught my attention: meaty lasagna. I am a big fan of a good meaty lasagna bolognese, but I can't make it all the time because it is a guilty pleasure for me. So I read the article and recipe thoroughly to see what they did to make it good. And I used a lot of their ideas and can I tell you I think this is the best lasagna I've made yet! They only put the bechamel sauce on top because I guess since it's not made of beef, when the bolognese sauce was alternated it didn't have enough of a meaty taste to it. I thought I would miss the creamy layers, but it actually was just fine. So I suggest giving this recipe a try. It's basically the same as my lasagne bolognese recipe but instead of ground beef I used ground chicken and 1 lb of white button mushrooms chopped really fine in a food processor. I added both of those after the onions, garlic, and carrots were soft and cooked through. And in all the layers I used the bolognese except for on top I did the bechamel and cheese on top. You can add cheese in the bolognese layers if you want, but you don't have to. I used Pecorino Romano cheese because it has a strong, salty flavor so I wouldn't need to use as much to have a good cheese flavor. Overall, I think this is a good alternative to the traditional lasagna bolognese without tasting like an alternative "light" meal. Blake said he couldn't tell the difference, really. And by the way, I know there are a ton of mushrooms in it, but it doesn't taste mushroom-ey at all, for those of you who hate mushrooms. It just adds to the meaty texture without altering the taste. So tonight's dinner was definitely a success!

Today we celebrated our 2nd wedding anniversary, so I thought I'd better make one of Blake's favorites: ぎょうざ (gyo-za), or potstickers. These things are amazing. I could honestly eat like 40 in one sitting! And once you get the hang of the crimping, they're actually pretty easy.
For dessert, I was going to make something I've made before, but as I was looking through Ina Garten's Barefoot in Paris cookbook, Blake mentioned that he had never tasted Creme Brulée before! And that made me feel so guilty because whenever anyone asks me what my favorite dessert is, my answer is always Creme Brulée. So I HAD to make it for him. Ina says that Creme Brulée is the ultimate guy desssert, and I didn't know what she meant until I handed the blow torch to Blake and let him brown the top himself. He looked like a little kid in a candy store and even said, "this is perfect! It's the perfect combination of good food and danger." So now I believe, Ina. This IS the ultimate guy dessert!
ぎょうざ gyo-za
makes about 45-50
 1 lb ground pork
1/2 head of nappa cabbage, chopped fine
2-3 scallions, chopped fine
1 T fresh ginger, grated
2 cloves garlic, grated
3 T soy sauce
2 T sesame oil
6-7 dried shiitake mushrooms, reconstituted and chopped fine
1 package gyoza skins (round dim sum skins)
- Combine the pork, cabbage, scallions, ginger, garlic, soy sauce, sesame oil, and mushrooms in a large bowl.
- Take one skin, place about 1/2 T of the meat mixture in the middle, wet half of the edge of the skin, pull the dry side over the wet side, and make little "pleats" (I usually do about 6-8 mini folds). As you get used to this part, you can add more meat into the middle, but until then, start small. Put corn starch on a baking sheet and place the filled gyoza with the crimped side up on the baking sheet. (the corn starch will make it extra crispy on the bottom)
- In a non-stick skillet with a lid, pour about 1 T canola oil and heat to medium-high. Place the gyoza in a line on the skillet with the crimped side up and cook until the bottoms are browned. Once browned, pour about 2 T water into the pan and place the lid on top and cook for about 5-7 minutes until they are cooked through. Serve hot with rice.
for the dipping sauce (this is the traditional Japanese version, the Chinese version has a totally different dipping sauce):
soy sauce
rice wine vinegar
chili oil
- Combine ingredients to taste.
Ina Garten's Creme Brulée
makes 5-6 servings 3 C heavy cream
1 extra-large egg
4 extra-large egg yolks
1/2 C sugar, plus 1 T for each serving
1 t pure vanilla extract
1 T Grand Mariner (optional)
- Preheat the oven to 300°. In the bowl of an electric mixer fitted with the paddle attachment, mix the eeg, yolks, and 1/2 C sugar on low speed until just combined.
- Meanwhile, scald the cream in a small saucepan until very hot but not boiled. With the mixer on low speed, slowly add the cream to the eggs. Add the vanilla and Grand Mariner and pour into 6- to 8-ounce ramekins until almost full.
- Place ramekins in a baking pan and carefully pour boiling water into the pan to come halfway up the sides of the ramekins. Bake for 35 to 40 minutes, until custards are set when gently shaken. Remove ramekins from the water bath, cool to room temp, and place in the fridge until firm.
- To serve, spread 1 T of sugar evenly on top of each ramekin and heat with a kitchen blowtorch until the sugar caramelizes evenly. Allow to sit at room temp for a minute until the sugar hardens.
Tonight's dinner was a bit of a disaster, so if it wasn't for Rebekah's challenge, I definitely would not have bothered taking a picture of it and posting it. It was really yummy, but I guess the pan I used to make the omelet part wasn't non-stick enough. So it's a rustic version of my favorite オムライス (rice omelet) . I used lil' smokies instead of the chicken since I had those on hand (I actually bought them for this recipe because a Japanese cookbook I have suggested that ... ), and this time I didn't use corn. It was really yummy:)

Because we took a long nap (miraculously Ella let us) and we went to the dog park laste this afternoon, I didn't get to start on dinner until 6:30, which means I had to make something fast. So unfortunately I didn't get to make lasagna like I had planned, and I made creamy tomato sauce with whole wheat penne instead. And some shaved Pecorino Romano on top. It was definitely a pleasant, quick dinner:)

I was craving frittata again, so I had to make it again. This time I used 5 whole eggs and 5 egg whites, like the recipe actually called for and it was so much lighter! I was impressed. And I used lil' smokies instead of bacon and I actually thought it went better with the potatoes. I sliced them really thin so their smokey flavor wouldn't take over, and I think that was a good choice. Any bigger and they would have been distracting. I just made it on August 15, and it was worth making again.

Since I'm going to be gone the whole first week of September, I had to make some easy re-heatable dishes for Blake to eat while I'm gone. So I made the classic Bolognese sauce. And I wasn't about to make a whole batch and put it all in the freezer and not let myself enjoy some! So we had some for dinner. Yum yum!
Bolognese sauce
makes enough for about 2 or 3 lbs of pasta, so use some tonight and store the rest for a lazy day
 2 cans crushed tomatoes
1/2 medium yellow onion, chopped fine
equal amount of carrots, chopped also (I use my food processor)
4-5 cloves of garlic, minced (optional)
vegetable or olive oil
1 lb lean ground beef
- In a large pot, cook onions, garlic, and carrots on medium-high heat until soft and slightly browned, stirring constantly. Once cooked, add beef, breaking up as you go. Cook through. Add tomatoes and cook until slightly thickened.
- Reserve 1/4 C of sauce and toss the rest with the pasta. Place the tossed sauce and pasta on a plate and top with reserved sauce and freshly grated Parmesan or Pecorino Romano.
When I was a kid, I have a memory of our family often going to a special Italian restaurant in Tokyo, and my favorite dish there was salmon in cream sauce with fettuccine. I remember as a child always wishing I could find it on other menus, but I never did and I felt like I had lost something great.
A few years ago during the winter, I had made a white stew with salmon instead of chicken or pork, and I remembered my favorite pasta dish. And that was when I fell back in love with that cream and salmon combination. So tonight, even if it's a little heavy for Summer, I decided to reminisce a little. I used 1% milk because that's what we had in our fridge, but I recommend using whole milk. The lower the fat content in a white sauce, the gluey-er it will seem. Also, use good quality salmon or the whole sauce will taste a little fishy. If you can find really wide fettuccine (they come in little nests), use that. The normal long strands of fettuccine they sell in most grocery stores here isn't as wide as I think fettuccine should be. But I had to settle for the normal stuff tonight:(
Salmon cream sauce with fettuccine
serves 2 1 large fillet of salmon, cut into 1/2 inch pieces
2 T flour
2 T butter
2 C milk
2 cloves garlic, grated
1/4~1/2 C grated Pecorino Romano cheese
1/8 t nutmeg
salt and pepper to taste
1/2 lb pasta
- Boil the pasta very al dente. You want to take them out of the water a couple of minutes before they're done cooking so they can continue to cook in the sauce for a couple of minutes.
- In a sauté pan with high sides, cook the garlic and butter until garlic is fragrant and butter is completely melted. Add flour and stir well. Gradually add milk, about 1/4~1/2 C at a time, whisking to avoid lumps. Add salt, pepper, and nutmeg.
- Add the pieces of uncooked salmon into the sauce and let simmer. The salmon will cook quickly. Add more milk if the sauce gets too thick.
- Add the pasta to the sauce and toss to combine. Top with lots of cheese.
I made my "wannabe Asian" again, but this time I added grated fresh ginger and thinly sliced nappa cabbage. I thought it worked a little better. If you want the recipe, you can check out my original attempt at generic Asian-American from July 26.

Tonight I made からあげ, one of my favorites. And this time I didn't burn it! Woo hoo!
It's a tasty Japanese fried chicken with ginger and soy sauce as the seasonings. Definitely worth a try. If you want the recipe, go to my May 14 post. Yay fried food! ... so much for healthy, huh? I've been bad this week!

This is a French Lasagna with a bechamel sauce and portobello mushrooms. I really enjoyed it! It was a nice change from the usual Lasagna Bolognese that I always make. Remember when making this dish to use a good quality strong, salty cheese like Parmigiano Reggiano or Pecorino Romano.
Portobello Mushroom Lasagna
makes 1 9x13 inch pan
 1-1/2 lbs Portobello mushrooms, stems removed and sliced 1/4 inch thick
1/2 C butter
1/2 C all-purpose flour
1 t ground nutmeg (I always grate whole nutmeg cloves)
2 C freshly grated Parmesan or Pecorino Romano
1 box no-boil lasagna noodles
salt
1 t freshly ground pepper
4 C milk
- Preheat the oven to 375°. In a medium sauce pan melt 6 T of butter. Add the flour and whisk together. Gradually add the milk, about 1 C at a time, and remember to add to salt, pepper, and nutmeg after about the first cup of milk. Once thickened, remove from heat and set aside.
- In a large sauté pan, melt 2 T of butter. Take half of the mushrooms and cook until softened and slightly wilty. Transfer to a bowl and cook the rest of the mushrooms.
- In a 9x13 inch baking dish, spread some sauce on the bottom. Arrange a layer of noodles, some more sauce, 1/3 of the mushroom, and 1/2 C of the cheese. Repeat two more times and then add noodles, sauce and the remaining cheese on top.
- Cover with foil and bake for about 45 minutes. Take the foil off and bake another 5 minutes or so until the cheese is golden-brown. Let rest for 10-15 minutes, serve hot.
I made easy chicken enchiladas again today. This time I served it with diced avocados and simple homemade salsa on the side. These enchiladas are really simple and make a lot of food with pretty minimal prep.
Easy chicken enchiladas and Homemade Salsa
makes 10-12 enchiladas
 Enchiladas:
10-12 small (6-8 inch) tortillas (I use flour but the recipe I used calls for corn, so either way)
3 C shredded cooked chicken (I always just buy a rotisserie chicken and use about 2/3 of it)
12 oz shredded cheddar (or other shredded cheese you want to use such as Monterey Jack)
2-1/2 C enchilada sauce
1 to 2 (4 oz) cans of chopped green chiles, drained
salt and pepper
- Preheat oven to 400°. In a medium bowl, combine chicken. 2 C cheese, 1/2 C enchilada sauce, and chiles. Season with salt and pepper to taste.
- If the tortillas are stiff (if you're using corn tortillas especially), place the tortillas on a microwave safe plate, cover with plastic wrap, and microwave for a about a minute to get them pliable.
- Place 1/3 C of the chicken mixture in one tortilla and roll it up. Place it on a 9x13 inch baking pan, lightly sprayed with vegetable oil spray. Repeat with all 10-12. If you're making 12, you'll need to make 2 layers. If you're making 10 you should be able to fit them all in on layer.
- Pour the rest of the enchilada sauce on top, making sure to coat the enchiladas thoroughly, and sprinkle with remaining cheese. Place in the oven for 20-25 minutes, until they are warmed through. Take the foil off and bake for another 5-10 minutes or until the cheese is bubbly and slightly browned. Serve with Homemade Salsa, avocados, sour cream, and lime wedges.
Homemade Salsa:
1/2 vidalia onion, diced small
7-8 small sweet tomatoes or 1 container of grape/cherry tomatoes, diced small
1 bunch of cilantro, chopped fine
juice of 1 lime
salt to taste
- Combine all ingredients in a large bowl:) Easy, right?
Tonight I made a baked, breaded Salmon fillet with edamame, sautéed zucchini, and lettuce on the side. Served with rice, of course. The salmon was a slight disappointment because it wasn't the best quality, so if you want to try this recipe, use really good salmon. Otherwise, I recommend cooking salmon in a more flavorful sauce that kind of masks the fishiness of it. I've made this before when we lived in Provo and the quality of the frozen Salmon was a lot better than what they had here at Sam's club ...
For the zucchini, I just sliced them thin and sautéed them in s a little bit of vegetable oil and once they were soft, I added a little bit of soy sauce, about 1/2 T, and cooked until it was absorbed into the zucchini and served it warm.
For the salmon, I just coated it in flour (that I added salt and pepper to), egg, then panko (Japanese breadcrumbs) and baked it on a rack on top of a parchment-lined cookie sheet in a 450° oven for 10 minutes on each side. I served it with bulldog sauce and I put some Japanese Mayo on mine. That's about it. Pretty simple Dinner tonight.

I had to cut back on my budget this week, but I didn't want to sacrifice taste, so I searched my cookbooks and I'm pretty impressed with my menu for the week. Tonight we started with a Martha Stewart everyday food recipe for Potato and Onion Frittata (and don't worry, Celeste, she didn't say "frit-ha-t-ha"! What a miracle!). Frittata is a sort of Italian rustic omelet. You can serve it for any meal of the day, really. I added bacon and Pecorino Romano cheese and I served it with a simple green salad. I also don't like rosemary that much, so I replaced that with my favorite herbes de provence. And I don't like to waste eggs so I used 10 whole eggs instead of 5 whole eggs and 5 egg whites. I thought it was a great cheap, hearty, and tasty dinner.
Oh, and make sure you use an oven-proof skillet!
Frittata
serves 4
 olive oil
1 large onion, thinly sliced
1 russet potato (about 8~12 oz) peeled and thinly sliced
1/2 t herbes de provence
salt & pepper
10 eggs
1/2 C flat leaf parsley, chopped coarse
1/4 C grated Pecorino Romano or Parmesan cheese
4 slices bacon, cut into little pieces
- In a medium (10-inch) non-stick skillet, heat 1 T oil over medium heat. Add onion, potatoes, and herbes de provence. Season with salt and pepper and toss to combine.
- Cover the skillet and let the onions and potatoes cook through, about 5 minutes.
- Meanwhile, In a medium bowl, whisk together eggs, parsley, 3/4 t salt and 1/4 t pepper. Place the bacon pieces on a paper towel on a microwave-safe plate and microwave for 3 minutes or until bacon is cooked through but not yet crispy.
- Heat the broiler. Add another tablespoon of oil to the potatoes and onions. Turn the heat down to low and add the bacon and eggs. Periodically pull the edges of the eggs into the middle and cook until the middle looks set, about 10 minutes.
- When ready to put into the oven, sprinkle cheese on top and place under the broiler. Cook until top is set and lighty golden and cheese is bubbly. Run a clean silicone spatula around the edges to loosen the frittata and slide onto a serving plate and cut into wedges.
p.s. don't forget to use an oven mitt to take the skillet out of the oven and after. I almost burned my hand when I picked it up again ... oops!
Tonight I made some ginger chicken. I diced it instead of slicing the chicken, which I think was a bad call. Other than that, it was perfect:)

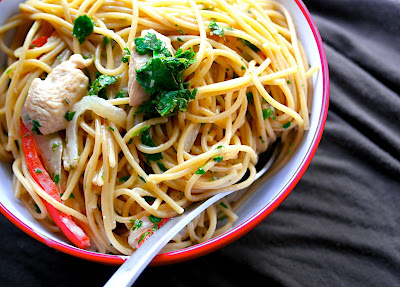
My friend Megan emailed me this cookbook that I like to call the "restaurant cheat-sheet". And I was super excited because they had the recipe for my favorite dish at one of my favorite restaurants: Chicken Tequila Fettuccine from California Pizza Kitchen. I didn't have tequila or spinach fettuccine, and I didn't want to use a whole lot of butter and heavy cream, so I made my adjustments ... but it still reminded me of the original, and Blake and I definitely enjoyed dinner tonight! I just had to resist from getting seconds ...
Chicken Tequila Fettuccine (wannabe)
Makes 1 lb of pasta
 1 lb long pasta, such as linguine, fettuccine, or spaghetti
2 bunches of cilantro, chopped fine
2 red bell peppers, cut into strips
1 large yellow onion, sliced thin
3 cloves garlic, finely minced
1 large chicken breast, cut into 3/4 inch pieces
juice of 2 limes
3 T soy sauce
3/4 C heavy cream (and that is still half of what the original recipe called for!)
1/2 C chicken broth
2 T white wine
- Cook pasta to al dente, drain, and set aside.
- Brown the chicken in a deep frying pan. One browned, add soy sauce and cook another couple of minutes. place in a bowl and set aside.
- Cook the red peppers and onion and garlic until soft.
- In a sauce pan, cook the chicken broth, white wine, and heavy cream until sauce thickens.
- Combine pasta, onions & peppers, chicken mixture, and sauce and toss carefully. Add cilantro and lime juice over the top and toss until cilantro is evenly distributed.
Tonight I made a strata pretty similar to the one I made back when we lived in Provo. This time I used asparagus instead of broccoli. First I cooked the bacon in a pan and got rid of most of the fat but left a little bit and lightly sautéed the asparagus in it. I used a day old French Loaf I had made, and decided for the bread, the crustier the better. It soaked up the egg mixture perfectly, leaving a small bite and a crunch on the edges. I also made it in a 9x9 square pan instead of a 9x13, so I used half the eggs, cheese, milk, and bread. But I think I might have still used the same amount of veggies. It was packed with asparagus! Also I used Mozzarella and Pecorino Romano cheese this time instead of Cheddar and I liked it a lot better. Plenty cheesy, but not distracting. If you decide to make it small, remember the baking temp is the same but the time is about half.

Tonight we had the improved classic, the BLACT: bacon, lettuce, avocado, cheese, tomato. I used super thin slices of Pecorino Romano Cheese, but you might want to use a milder cheese. Depends on what you prefer.

I was determined to make a special dinner for Sunday Dinner this week, but I'm still trying to lose my baby weight, so I wanted to do something hearty but healthy. So I dove into the "light" section of my "The America's Test Kitchen Family Cookbook" to see if there was anything worth cooking. Since I was planning on making a bunch of chicken dishes this week, I thought Chicken Parmesan sounded good. And it was fairly simple and The people of America's Test Kitchen never make gross food, so i knew this would be worth it. And oh my gosh it sure was! I cut a couple of corners to make it go by faster, so this isn't the exact recipe from the book. But it was still amazing!
I served it with a side of Barilla's Penne Plus tossed with the same sauce I put on top of the chicken and it was perfect and light but hearty and healthy. I loved it! And Blake even said this was one of his new favorites. Woo hoo!
Light Chicken Parmesan
Serves 4
 1-1/2 C panko
1 C grated Pecorino Romano Cheese (of course the recipe calls for Parmesan since this is Chicken Parmesan ... but Pecorino Romano is a wonderful substitute that we use A LOT in our home)
1/2 C all-purpose flour
1 t garlic powder
salt and pepper
2 large eggs
2 large chicken breasts, cut into thin cutlets
2 C simple tomato sauce (I just used my creamy tomato sauce without the cream)
1/4 C grated mozzarella cheese
- Heat the oven to 475°. Combine breadcrumbs and Pecorino Romano cheese in a dish. In a separate dish, combine flour, 1 T sat, 1/2 t pepper, and garlic powder. In a third dish, lightly beat the eggs.
- Pat the chicken cutlets dry and coat with flour and then egg, making sure to remove excess. Then coat generously with breadcrumb mixture. Place all 4 cutlets on a wire rack on top of a lined cookie sheet. Place in the oven for 15~25 minutes or until chicken is cooked through and the coating is browned.
- Pull out of the oven and top with tomato sauce and cheese and put back in the oven for 5 minutes or until cheese is bubbly and browned. Serve while hot.
Because chicken breasts at Sam's club were so cheap, I decided this week will be a chicken-filled week. So we started out tonight with a Japanese classic, 親子丼 oyako-don, a rough translation being parent-child bowl. Kind of a sick image in English, but that refers to the chicken and the egg. And it's pretty amazing. Anyone who grew up or served a mission in Japan knows what I'm talking about;)
親子丼
makes 2 servings
 1 large or 2 medium chicken breasts, cut into 3/4 inch pieces
3 eggs, lightly beaten
1 medium onion, sliced thin
4-1/2 T stock (I use Japanese dashi, but because it's a small portion and it's a chicken dish, you can use chicken broth. It'll be different, but still really good.)
3 T soy sauce
2 T sugar
3 T mirin (Japanese sweet cooking wine)
2 bowl sized servings of Japanese short grain rice
- In a small pot bring the stock, soy sauce, sugar, and mirin to a simmer. Add the onions and chicken and cook until onions are soft and chicken is cooked through.
- Pour the eggs over the chicken simmering sauce and let set a little.
- In 2 bowls place the rice on the bottom and take half of the chicken/egg mixture and place in one bowl and the other half in the other. Serve hot.
Tonight I made of my favorites, Pasta Puttanesca. I kind of ran out of fridge items and I was too lazy to go to the grocery store, so it was perfect. If you want the recipe you can go to my June 4th post.

Wow, so I've made it through a full week of this daily documenting. 3 more weeks to go!
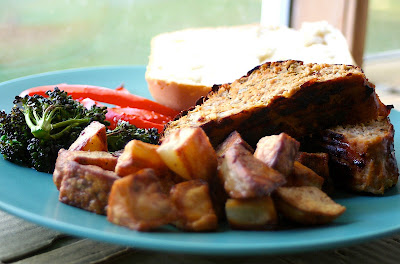
Tonight, Blake asked for something "American" and I realized I don't really know what that is ... I don't cook American very much, so this was a good test for me. I was watching Martha Stewart this week and she made a Turkey Meatloaf and I thought "there's nothing more American than meatloaf, right?" So I decided to give it a try. I've never made meatloaf before, to be honest, so it was a challenge. I didn't have ground turkey, but I did have ground chicken, and I didn't have 3 lbs of it, so I made a free-form small one. And I didn't have sage, so I used the only dried herb blend that I like to use, herbes de provence. I think it turned out pretty well, actually.
As a wedding gift, Blake bought me The Bride & Groom First & Forever Cookbook and I found a really good roasted potato recipe. The potatoes turn out so crispy and tasty!
And then on the side I roasted some red bell peppers and some broccoli again. I baked some home made bread to complete my American meal. I think it turned out pretty well!
 Chicken Meatloaf:
1 lb ground chicken
1/3 C panko breadcrumbs
1/4 C milk
1 small onion chopped fine
2 cloves of garlic, minced
3 T chopped fresh parlsey
1/2 t herbes de provence
3 T ketchup
1 T dijon mustard
1 large egg, lightly beaten
salt and pepper
- Preheat the oven to 375°
- In a small bowl, soak the panko in the milk. Stir to combine and let sit for 5 minutes until the milk is fully absorbed.
- Combine all ingredients in a large bowl and loosely form into a loaf. Place on a small cookie sheet lined with parchment paper. Bake for 1 hour and 15 minutes, or until the center is fully cooked through.
Roasted Potatoes:
1~2 large Russet potatoes (about 1 lb total), peeled and cut into 1 inch pieces
1 T butter
1 T vegetable oil
salt and pepper to taste
- Preheat over to 375°. In a large baking dish, put butter and oil and place in the oven until butter is bubbling.
- Place potatoes in butter-oil mixture and toss until potatoes are coated. Sprinkle with salt and pepper and toss again. Bake for 1 hour and 15 minutes or until potatoes are browned and crispy and cooked through. Serve hot.
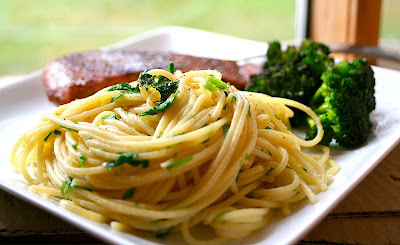
So I've been noticing that though I think I've been making some decently healthy-ish meals, I've been portioning a little too big. So I decided to use veggies to fill up and use the pasta as a side kind of thing. And it turned out great! I was actually full with just a small amount of starch.
I made Aglio e Olio for the pasta and I made up my own Balsamic/garlicky Salmon and roasted broccoli. So here are the fish and broccoli recipes.

 For the salmon:
1 large fillet of Salmon, cut into 2 equal portions
3 T white wine
1 large garlic clove, grated or minced fine
1/2 t crushed red pepper flakes
2 T olive oil
2 T balsamic vinegar
salt and pepper to taste
- In a medium skillet, heat up the oil garlic, and red pepper flakes at medium-high heat. Meanwhile, season the salmon fillets on both sides with salt and pepper.
- As soon as the garlic is cooked through but not browned, place the salmon on the pan and sear on both sides.
- Pour white wine and balsamic vinegar until the alcohol is cooked out and the vinegar thickens. Flip the fish over to coat the other side.
For the broccoli:
1 large broccoli crown, cut into small pieces
olive oil
salt and pepper to taste
- Turn broiler on.
- On a small cookie sheet toss the salt, pepper, oil, and broccoli.
- Place under the broiler for about 7 minutes, or until the broccoli tips are crispy and browned.
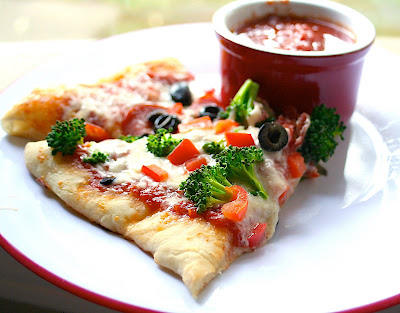
Tonight we had Pizza. I made a veggie one and it was tasty tasty! We had some left over pizza sauce so I put it in a mini ramekin to dip the crusts. And of course, as always, amazing Blake did all the work (except the sauce). Thanks, baby!
If you want the recipe, go to my post on May 16 .
Tonight I was craving some Indian curry, so I made Lisa's Vegetable Curry again. This time I used zucchini instead of eggplant, and I don't think it was quite as good, but that's what I had in my fridge, so it worked. My one suggestion would be to seed the zucchini first (if you have one as huge as the one I had! It was practically a baseball bat!). Yum yum yum!
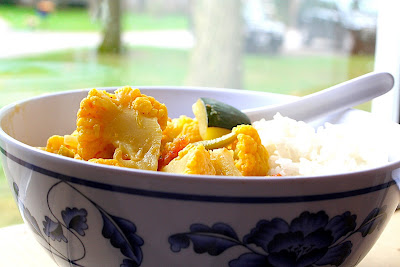 Can you tell I took all the cauliflower?
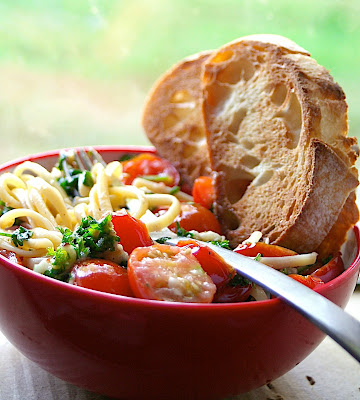
For dinner tonight, I borrowed one of Ina Garten's recipes. She calls it "Summer Garden Pasta", but I like to call it Bruschetta Pasta because it reminds me so much of the amazing bruschetta my sister makes. It's pretty simple and super garlicky and perfect for a Summer day. I even used my tomatoes from my own tomato plant! Woo hoo!
And I substituted parsley for basil. Not because I don't like basil, only because it's expensive ... But please, if you recreate this recipe make it with basil if you prefer. So tasty!
Bruschetta Pasta
Makes 1 lb of pasta
 4 pints cherry tomatoes, cut in half
1 large bunch of parsley, chopped fine
1-1/2 C parmesan cheese, grated
1/4 C olive oil
salt and pepper to taste
4 cloves of garlic, grated or minced fine
1 lb linguine pasta
- In a large bowl, combine the oil, salt and pepper, parsley, tomatoes, and garlic. Cover with plastic wrap and let sit at room temperature for 2~4 hours.
- When ready to eat, boil pasta to al dente. Make sure and reserve a little bit of pasta water.
- Meanwhile, grate parmesan cheese and put in the bowl with the tomato mixture and toss to coat.
- Once pasta is done, place in the bowl with tomatoes and combine. Add a little pasta water to loosen the sauce if needed.
- Serve with extra cheese and crusty bread.
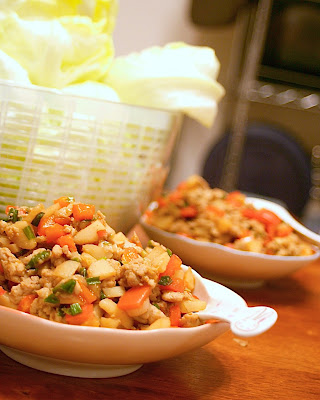
For dinner tonight, we made quick Asian Lettuce wraps.
Every Friday I make a menu for the week and we go grocery shopping. We don't necessarily decide what meal we eat on what day so that we can have what we feel like. (This started when I was pregnant and my food mood changed every 5 minutes) Well, today was an especially cranky day for our little princess so we had to eat something fast, and since we actually went to the gym today and worked out, I thought it would be good to have something semi-healthy, too. Makes your workout feel even more worthwhile. Anyway, with all those factors thought through, we decided to make our favorite Quick Asian Lettuce Wraps that Blake made for my birthday last year, and we made on Kumo's birthday this year on May 22.
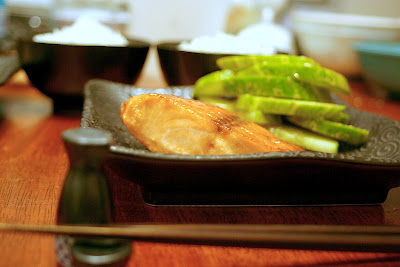
As I promised Rebekah, I am accepting her challenge and attempting to do a month of recipes. So we started out August with a pretty typical Japanese dish. We finally got a membership at Sam's Club today (I miss Costco ... but they don't them here! grrr ...), and thankfully they had Salmon fillets.
My neighbor has a mini farm, as I mentioned previously, I think, and we picked some cucumbers so I made a simple cucumber salad with Japanese ginger dressing on the side. And of course it was all served with a bowl of rice and miso soup. (I know, the cucumbers look a little yellow. Don't ask me why. They tasted normal, though)
Japanese Salmon
serves 2
 2 medium skinless, frozen Salmon fillets, thawed completely in cool water
3 T soy sauce
1 T sugar
2 T mirin
1/4 C dashi (Japanese fish & seaweed stock)
oil for cooking
- In a small bowl, combine the dashi, soy sauce, mirin, and sugar, until sugar is dissolved.
- In a small pan, heat the oil on medium-high heat. Place the Salmon on the pan and sear both sides, about 30 seconds on each side.
- Pour the soy sauce mixture on top of the salmon and let simmer. Flip the salmon over to make sure it is getting coated on both sides. Cook until sauce thickens a little. Serve warm with rice, a light salad, and

